Your pool has been dormant all winter. Now it’s time to wake it up, the right way.
Spring is finally here, and you’re probably excited to jump back into your pool. But before you flip that heater switch, stop. I’ve spent 20 years installing pool systems across every US climate zone, and I can tell you: how you start your heater determines whether you’ll have a smooth season or an expensive emergency.
In this guide, you’ll learn exactly how to start your above ground pool heater in spring, whether you own a gas heater, heat pump, solar system, or electric unit. You’ll also discover the most common mistakes I see homeowners make, how to troubleshoot 17 different startup problems, and when to call a professional before things get costly.
Table of Contents
When to Start Your Above Ground Pool Heater in Spring
The worst mistake I see? Starting the heater too early.
Here’s the truth: Your region matters. Your heater type matters. And whether your water is balanced matters even more.
Regional Spring Opening Timelines
I’ve worked from Phoenix to Minnesota, and freeze risk varies dramatically. Here’s when YOU should open your heater:
| Region | Recommended Opening | Daytime Temp | Why This Timing |
|---|---|---|---|
| South (TX, FL, AZ) | March–Early April | 70–75°F+ | Freeze risk minimal; warm days arriving |
| Central (GA, SC, LA) | Mid-April | 65–70°F | Occasional late freezes; warming trend |
| Northeast (NY, PA, NJ, MA) | Late April–May | 55–65°F | Frost risk through May; water still cold |
| Midwest (IL, IN, OH, MI) | Late May | 50–60°F | Winterization effects; slow warm-up |
| North (MN, WI, ME, ND) | Late May–June | 45–55°F | Ice-off lakes; freeze risk high until June |
The rule I always follow: Don’t open until daytime temps are consistently above 70°F. One 80°F day doesn’t count. You need 3–5 consecutive warm days.
💡 Expert Tip: Check your 10-day forecast before opening. If another freeze is coming, wait. Starting your heater before a late frost can cause cracked heat exchangers, a $500–$2,000 mistake.
Temperature Guidelines for Heat Pumps vs Gas Heaters
This is where most people get confused. Heat pumps and gas heaters have completely different spring startup rules.
Gas Heaters:
- Can start as soon as your pool water is balanced
- Work in any ambient temperature
- Will cause condensation when heating cold water (normal, not a leak)
- Safe water startup temp: 68°F+
Heat Pumps:
- CANNOT start if ambient temperature is below 50°F
- Won’t work efficiently below 60°F
- Need warmer outside air to extract heat
- Safe water startup temp: 50°F+
⚠️ WARNING: If you force a heat pump to start below 50°F, it will either shut itself down immediately or damage the compressor trying. Don’t do it.
Why Timing Matters for Heater Longevity
Starting your heater at the right time isn’t just about convenience, it affects how long your equipment lasts.
Here’s what happens with poor timing:
Too Early (Before Water Balanced):
- Imbalanced water attacks metal components
- Heat exchanger corrosion accelerates
- Ignition system can misfire with dirty water
- Voids some manufacturer warranties
Too Early (Before Late Freeze Risk):
- Freeze damage to heat exchanger ($2,000–$3,000 replacement)
- Cracked PVC plumbing
- Damaged pump seals
Too Late (Waiting for Perfect 80°F Days):
- Pool stays algae-green longer
- Water temperature drops into 50s–60s at night
- Takes 3–4 weeks to heat once you start
The Goldilocks Zone: When daytime highs hit 70–75°F consistently and your water is chemically balanced, that’s your go time.
The 6-Step Spring Startup Sequence (Do These in Order)
I’ve trained dozens of pool owners, and the ones who follow this exact sequence never have startup problems. Those who skip steps? They call me in June with expensive issues.
Follow these 6 steps in order. Don’t skip ahead.
Step 1: Remove Cover and Clear Debris
This is obvious but critical. Your heater is an air-breathing machine—if it’s covered in leaves, pollen, or mold spores, those contaminants get sucked into the burner.
What to do:
- Remove the pool cover completely
- Inspect the cover condition (recyclable? donate?)
- Clean the pool skimmer basket and pump strainer basket
- Use a skimmer net to remove large debris from the water surface
- Wipe down your heater exterior with a damp cloth
- Clear 3+ feet around the heater of debris
💡 Expert Tip: Spring is pollen season. If you notice excessive pollen in your pool, your filter will clog quickly. Plan to backwash more frequently for the first 2–3 weeks.
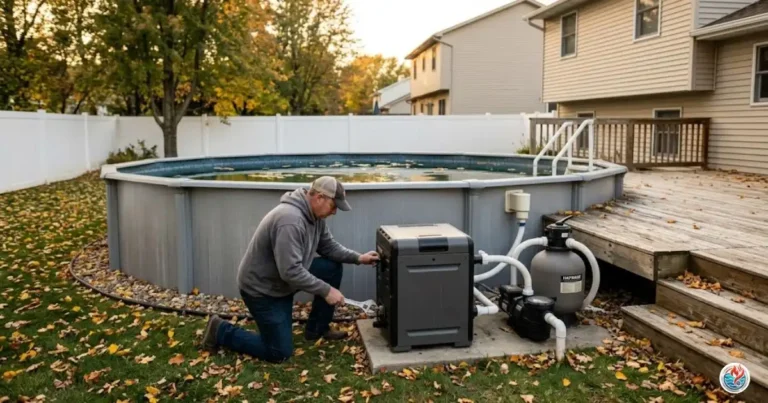
Step 2: Inspect and Reassemble Equipment
This step separates DIY owners who succeed from those who fail. I’ve found cracked heat exchangers, rodent damage, and corroded gas lines by taking 20 minutes to inspect properly.
Reinstall Drain Plugs and Valves
- Your drain plugs were removed before winterization
- Reinstall with fresh Teflon tape (wrap 3 layers clockwise)
- Tighten firmly, but don’t overtighten (can crack the fitting)
- Check the o-ring gasket, replace if cracked or hardened
Reconnect Hoses and Plumbing
- Inspect all hoses for cracks, leaks, or sun damage
- Reconnect inlet and outlet lines to heater
- Use hose clamps on both sides of each connection
- Tighten clamps evenly (not too tight, you can crack the fitting)
Lubricate O-Rings and Gaskets
This is the mistake that costs thousands. Only use silicone-based lubricant (Magic Lube, Jack’s 327). Petroleum jelly (Vaseline) will swell and destroy your seals.
- Apply a thin coat to all o-rings on unions
- Apply to thermostat stem o-ring
- Apply to any hose connection that had an o-ring
- Wipe away excess with a clean cloth
⚠️ WARNING: Never use Vaseline or petroleum-based products on pool equipment. I’ve seen $800+ in seal replacements from this single mistake.
Step 3: Fill Pool to Proper Water Level
Before circulating water, your pool must be at the right level. Too low? You can damage your pump. Too high? You’ll overflow when you backwash.
The rule: Fill to 75% of your skimmer basket height. On most above-ground pools, this is 18–24 inches up the side.
Why this matters: If your water level is too low and you run the pump, the pump seal can run dry. A dry seal fails in about 30 seconds. That’s a $200–$400 repair you can avoid with 2 minutes of checking the water level.
Step 4: Prime the Pump and Establish Circulation
Priming means filling the pump basket with water so it can create suction.
For Single-Speed Pumps (most above-ground systems):
- Open the drain plug on the pump strainer basket
- Fill the basket with water from your pool using a bucket
- Water should flow out—keep filling until a steady stream comes out
- Close the drain plug firmly
- Turn on the pump
- Wait 2–3 minutes for water to circulate through the filter
For Variable-Speed Pumps (Hayward, Pentair, Jandy models):
- Follow same priming steps above
- Use the pump’s “prime” setting if available
- Monitor the pressure gauge, it should jump to 5–10 PSI within 60 seconds
- If no pressure after 2 minutes, turn off and re-prime
💡 Expert Tip: If your pump won’t prime after 3 attempts, you likely have an air leak in the suction line. Check all intake connections for cracks. Don’t force it, air leaks get worse.
Watch your pressure gauge. If it’s reading zero even though the pump is running, you have a problem:
- Clogged filter (backwash)
- Kinked hose
- Air leak in suction line
- Pump seal failure
Don’t ignore this. Operating the pump with zero pressure will destroy the seal in minutes.
Step 5: Clean and Balance the Water
This is the step most homeowners skip. Don’t be that person.
⚠️ WARNING: Starting your heater before the water is balanced can void your warranty and cost thousands in damage. The corrosive water will eat through metal components.
Chemical Order (this matters):
- Alkalinity First (Use sodium bicarbonate) → Target: 80–120 ppm
- pH Next (Use pH increaser or decreaser) → Target: 7.2–7.6
- Calcium Hardness (Use calcium chloride if needed) → Target: 200–400 ppm
- Shock (Calcium hypochlorite or liquid chlorine) → Follow package directions
Why this order? Alkalinity buffers pH. If you adjust pH first, it will shift when you add alkalinity. Shock is last because hot water can release chlorine too fast.
Wait 24 hours after shocking before starting your heater. Running a gas heater while chlorine levels are still high can damage the ignition system.
💡 Expert Tip: Use fresh test strips every season. Old test strips (over 1 year old) give false readings. I’ve seen owners add chemicals unnecessarily because their test strips were expired.
Step 6: Start Your Pool Heater
You’ve done the prep work. Now it’s time to actually fire up the heater.
Pre-Startup Inspection Checklist
Before you turn anything on, do this 2-minute check:
- Water is circulating (pump running, pressure normal)
- Water is chemically balanced (test kit confirms)
- Gas valve is open (if gas heater)
- Thermostat is set to desired temperature (start at 78°F)
- Heater cabinet is dry (no water pooling on top)
- Vent clearance is 3+ feet on all sides
- No gas smell around the heater
- GFCI outlet has power (lights on if powered)
First Fire-Up Procedure
For Gas Heaters:
- Set thermostat to your desired temperature (78°F)
- Turn the heater power switch to ON
- Listen, you should hear the blower motor (fan) start
- Wait 30 seconds (pre-purge)
- You should hear a clicking sound (ignition sparking)
- A soft “whoosh” means the burner ignited
- Feel the outlet pipe, it should get warm within 2–3 minutes
If you hear clicking but no ignition:
- This is a common first-startup issue (see Troubleshooting section)
- Don’t try more than 3 times, the system has a safety lockout
For Heat Pumps:
- Set thermostat to your desired temperature (78°F)
- Turn the heater power switch to ON
- You should hear the compressor start after 5–10 seconds
- This is much quieter than a gas heater (no fan noise)
- The outlet pipe will gradually get warm (slower than gas)
For Solar Heaters:
- Ensure bypass valve is open to solar panels
- Turn circulation pump on
- Monitor water temperature over 2–3 hours
- Adjust bypass valve to control flow to panels
First 30 Minutes: Monitor the heater. Don’t leave it alone. Watch for:
- Normal sounds (gentle humming for heat pump, fan noise for gas)
- Water flowing properly from return jets
- No water leaks from heater cabinet
- No gas smell
If anything seems wrong, shut it off immediately. See the Troubleshooting section.
💡 Expert Tip: Record your startup date and initial water temperature in a log. Compare this to next year. If it’s taking longer to heat, your heater efficiency is declining, time for a professional service.
Spring Heater Inspection Checklist (Before You Start)
I keep a physical checklist in my truck. Over 20 years, this list has prevented more expensive repairs than I can count.
Use this checklist before you turn on your heater.
Visual Exterior Inspection
Check for Freeze Damage
Freeze damage is the #1 spring surprise I see.
Look for:
- Cracks in the heater cabinet (especially near the heat exchanger)
- Water stains inside the cabinet (sign of internal cracks)
- Warping or denting on the cabinet
- Discoloration from rust or corrosion
If you see cracks: Don’t turn it on. Call a professional. Operating a cracked heater can cause gas leaks or water damage.
Look for Corrosion and Rust
- Check all metal connections for orange/brown rust
- Inspect gas line connections (especially in coastal areas)
- Look at the mounting bolts, do they show rust?
- Check copper fittings for green patina (oxidation)
Light surface rust is normal. Deep pitting or flaking means the component is weakening.
Inspect Cabinet and Vent Openings
- Vent grill should be clear (no blocked louvers)
- Side vents should have 3+ feet of clearance
- Top should be clean (no leaves covering the vent)
- Cabinet edges should have no gaps (rodents can enter)
Gas Heater Specific Checks
Burner Tray and Heat Exchanger Cleaning
Lift the burner assembly (if your heater allows access):
- Burner tray is free of debris
- No spider webs (I’ve found dozens, they block the igniter)
- No dead insects or insect nests
- Heat exchanger fins are not clogged with leaves
- No white powder (scale buildup on tubes)
Important: Don’t force any parts. Some heaters require professional disassembly.
Gas Leak Testing (Soapy Water Method)
This is the only safe way to test for gas leaks. Never use an open flame.
What you need:
- Spray bottle
- Liquid dish soap
- Water
How to test:
- Fill spray bottle with soapy water (1 part soap, 9 parts water)
- Spray all gas connections (shutoff valve, inlet, outlet)
- Look for bubbles, any bubbles = gas leak
- If you see bubbles, immediately turn off the gas valve
- Call a professional before attempting startup
⚠️ WARNING: Never use an open flame or lighter to test for gas leaks. This can ignite the gas.
Ventilation Clearance Check
- Measure 3+ feet away from all vent openings
- No bushes, stored equipment, or walls too close
- Vent should face away from windows (to avoid drafts affecting combustion)
Ignition System Inspection
- Igniter electrode should be clean and shiny
- Flame sensor (if visible) should show no heavy soot
- If soot is visible: gentle vinegar wipe with a soft cloth (don’t touch with bare hands)
Heat Pump Specific Checks
Airflow and Coil Inspection
- Coil fins are not bent
- Coil is free of debris (leaves, pollen, dust)
- Fan blades are clean
- No ice or frost visible (not normal in spring)
Condensation Drain Check
- Drain line is clear and not clogged
- No standing water under the unit
- Drain opening is accessible
Refrigerant Line Inspection
- Copper lines show no signs of leaks (oily residue)
- Insulation on lines is intact
- No hissing sounds coming from connections
Minimum Temperature Considerations
- Don’t start if ambient temp is below 50°F
- If you must operate in cold, run at low setting (68°F water only)
- Monitor the unit, it may shut down if too cold (this is normal)
Solar Heater Specific Checks
Panel Inspection and Cleaning
- Panels are free of debris (leaves, dirt, pollen)
- Glass/surface is not cracked
- No visible leaks from panel seams
- Mounting brackets are secure
Airlock Prevention and Priming
Solar heaters often develop airlocks after winter.
- Bypass valve can be fully opened (not stuck)
- Return line from panels flows freely
- No air hissing sounds from connections
Vacuum Release Valve Check
- Valve is accessible
- Opens freely (not frozen or stuck)
- No debris blocking the vent opening
💡 Expert Tip: Solar heaters need patience. They can take 4–6 hours to prime properly. Don’t force the system. Let gravity work.
Electrical Safety Inspection
GFCI Testing
- Plug in the heater (if portable model)
- Press the TEST button on your outdoor GFCI outlet
- The outlet should cut power immediately
- Press RESET to restore power
- If this doesn’t work, call an electrician
⚠️ WARNING: A non-functioning GFCI is a serious electrical hazard. Don’t operate the heater until this is fixed.
Wire and Conduit Inspection
- No cracks in PVC conduit
- No visible wiring damage
- No water pooling near electrical connections
- Connections are secure (not loose)
Breaker and Connection Check
- Breaker hasn’t tripped (if it has, this is a sign of a problem)
- Wire connections at breaker are tight
- No burn marks around connections
How to Start Different Types of Above Ground Pool Heaters
Gas heaters and heat pumps need completely different startup procedures. Here’s the exact sequence for each type.
Starting a Gas Pool Heater in Spring
Pentair MasterTemp Startup
(Most popular above-ground gas heater)
Pre-Startup:
- Smell around the heater area, any gas odor means DO NOT PROCEED (call professional)
- Check the water flow, pump running, good pressure
- Fill the heater’s water jacket by opening the drain valve slightly
Ignition Sequence:
- Turn thermostat to desired temp (78°F)
- Press the power button (or flip switch to ON)
- You’ll hear the blower motor start immediately
- Wait 30 seconds (pre-purge cycle)
- You’ll hear 3–4 clicking sounds (ignition sparking)
- After the 4th click, you should hear a soft “whoosh” (ignition success)
- If you don’t hear the whoosh by the 4th click, the system enters lockout (safety feature)
If Lockout Occurs:
- Wait 10 minutes
- Turn power off and on again
- The system resets and retries
Error Codes: See the Troubleshooting section for specific Pentair codes.
Hayward H-Series Startup
(Common mid-range above-ground heater)
Key Differences from Pentair:
- Has a separate pressure switch that must detect water flow first
- If pump isn’t running, the heater won’t ignite (safety feature)
- Thermostat is usually a simple dial (not digital)
Startup Steps:
- Ensure pump is running at least 3 minutes before starting heater
- Turn thermostat to your desired temperature
- Flip the power switch to ON
- The fan should start
- After 5–10 seconds, you should hear the ignition attempt
- If successful, you’ll see the flame indicator (if equipped)
Hayward Safety Feature: If the flame goes out, the system waits 30 seconds before retrying (prevents gas buildup).
Raypak Startup Procedure
(Premium above-ground heater, known for reliability)
Pre-Startup Checklist (Raypak’s Top 7):
- Seal any openings in the heater cabinet (rodents)
- Inspect for rodent damage to wires
- Remove any debris from the burner area
- Look for spider webs in the burner tube
- Check electrical integrity (no loose wires)
- Inspect the gas line for corrosion or damage
- Have all replacement parts ready (igniter, fuse, etc.)
Startup:
- Open the gas shutoff valve fully
- Turn power on
- Set thermostat to desired temperature
- Monitor the first 5 minutes closely
Raypak Advantage: These heaters are robust and rarely fail on startup. If they don’t ignite, it’s usually something simple.
Jandy JXi Startup
(Mostly found in commercial or high-end above-ground setups)
If Winterized (Most Important):
- Must reinstall drain plugs
- Must reattach pressure switch tubing
- Must reconnect all unions
Startup:
- Run circulation for 5 minutes before starting heater
- Check that water is flowing through heater
- Turn thermostat to desired setting
- Press the power button (digital models) or flip switch
Jandy Codes: These are LED-based and very specific. See Troubleshooting section for full reference.
Starting a Heat Pump in Spring
Heat pumps are completely different from gas heaters. Here’s what you need to know.
Minimum Ambient Temperature Requirements
- Below 50°F: Don’t start
- 50–60°F: Can run, but efficiency is poor
- 60–80°F: Optimal efficiency
- Above 80°F: Already warm, heating costs are low
Why temperature matters: Heat pumps pull heat from the air. Below 50°F, there isn’t enough heat in the air to efficiently warm your pool. The compressor will work hard, use lots of electricity, and barely warm the water.
AquaCal/Gulfstream Startup
(Most common heat pump for above-ground pools)
Pre-Startup:
- Verify ambient temperature is at least 50°F
- Ensure circulation is running
- Check that the compressor area is clear of debris
Startup:
- Set thermostat to desired temperature (78°F)
- Turn power on
- Wait 5–10 seconds (compressor engages)
- You’ll hear a quiet humming sound (this is normal)
- Monitor the unit for 15 minutes
- Water should gradually warm (slower than gas heater, this is normal)
Heat Pump Advantage: Quieter operation, more energy-efficient, very reliable.
Hayward HeatPro Startup
(Pool heat pump by the gas heater manufacturer)
Setup is similar to AquaCal but watch for:
- The unit may have a “vacation mode” switch, ensure it’s off
- Some models have a separate desuperheater (if your heater has one, it provides hot water)
- Digital control panel, set to HEAT mode (not cool mode)
Startup:
- Power on
- Set desired temperature
- Press the START button (if equipped)
- The compressor should engage within 10 seconds
Starting an Electric Resistance Heater
Electric heaters are rare for above-ground pools (they’re expensive to run) but here’s the procedure:
- Ensure 220V/240V power is connected
- Check the GFCI is functioning
- Set thermostat to desired temperature
- Power on
- The heating element will glow red (you may see this)
- Water will warm steadily (usually slow)
⚠️ WARNING: Electric heaters are energy hogs. A 6kW heater costs about $1–$2 per hour to run. Make sure you understand the cost before using one for hours daily.
Starting a Solar Pool Heater
Solar heaters are different because they use the sun, not fuel.
Spring Startup:
- Ensure the solar panels are clean (dust, pollen, bird droppings reduce efficiency by 30%+)
- Open the bypass valve fully (allows water to flow to panels)
- Run the circulation pump
- The water will gradually warm (patience required, 4–6 hours for noticeable warmth)
- On sunny days, you’ll see 2–4°F increase per hour
- On cloudy days, you’ll see minimal increase
Pro Tip: Use a solar cover at night to trap the heat the panels added during the day. This doubles your overnight temperature retention.
💡 Expert Tip: Don’t expect solar to match a gas heater’s speed. Solar is best for maintaining temperature, not for rapid heating. If you need the pool hot for a party this weekend, use a gas heater or heat pump.
Spring Startup Troubleshooting: 17 Common Problems & Fixes
I’ve fixed hundreds of heaters over spring season. These 17 issues account for 95% of all startup calls.
Heater Won’t Turn On at All
Power Issues (GFCI, Breaker)
The Check:
- Is the GFCI outlet powered? (Look for the outlet lights)
- Does the TEST button work on the GFCI?
- Is the main breaker in the ON position?
Common Causes:
- GFCI outlet tripped overnight (common if there’s humidity)
- Breaker flipped off (sign of an electrical problem)
- GFCI is defective
Quick Fixes:
- Press the RESET button on the GFCI outlet
- If it trips again immediately, DON’T keep resetting, call an electrician
- Check the breaker switch (should be fully to the right)
- Flip it off and on again
- If breaker trips again, this signals an electrical problem, professional needed
Thermostat Settings
The Check:
- Thermostat dial is set above the current water temperature (if water is 60°F, set thermostat to 78°F)
- For digital thermostats, verify the temperature is entered
Common Causes:
- Thermostat set to OFF
- Thermostat set to lower temperature than water (heater won’t run)
- Digital display is dark (might just need power reset)
Quick Fixes:
- Turn the thermostat dial clockwise to 78°F
- Listen for the heater to power on within 5–10 seconds
- If digital, press the SET button and increase the temperature
Timer Problems
The Check:
- Is your heater on a timer?
- Is the timer in the ON position?
- Did the timer get reset during winter shutdown?
Common Causes:
- Timer is set to OFF mode
- Timer clock is unplugged or power is off
- Timer is set to turn on at a future time (like 6 PM, and it’s noon)
Quick Fixes:
- Set the timer to MANUAL (bypass timer mode)
- Turn the heater on manually to test
- If it works on manual, reset the timer to the schedule you want
Heater Clicks But Won’t Ignite (Gas Heaters)
This is the most common spring startup issue I see. The ignition system is trying but failing.
Gas Supply Problems
The Signs:
- You hear 3–4 clicking sounds (ignition sparking)
- You don’t hear the “whoosh” of ignition
- Possible faint smell of gas (but no flame)
Most Likely Causes:
- Gas shutoff valve is closed or partially closed
- Gas line has an airlock (especially if heater sat all winter)
- Propane tank is empty or out of reach (if using propane)
Quick Fixes:
- Check the gas shutoff valve (it’s usually a ball valve near the heater inlet)
- Handle should be aligned with the pipe (parallel = OPEN)
- If it’s perpendicular (90 degrees), it’s CLOSED, turn it to parallel
- Bleed air from gas line (if you suspect an airlock)
- Loosen the gas connection at the heater inlet slightly
- Turn the heater on—gas should hiss
- Retighten after 10 seconds
- Check propane tank (if using propane)
- Ensure the tank isn’t frozen
- Ensure the tank has fuel (feel the weight)
Igniter/Electrode Issues
The Signs:
- Ignition system clicks but no spark visible
- System enters lockout after 3–4 attempts
Most Likely Causes:
- Igniter electrode is dirty or corroded
- Igniter gap is too wide (spacing issue)
- Igniter is defective
Quick Fixes:
- Clean the igniter (very common fix):
- Turn off power completely
- Locate the igniter (usually a white ceramic rod near the burner)
- Gently wipe with a soft, dry cloth
- Don’t use liquids (can damage electronics)
- Retest
- If cleaning doesn’t work: Igniter replacement is ~$50–$100 DIY or $200–$300 with pro installation
💡 Expert Tip: Igniter replacement is one of the easiest repairs. YouTube has excellent tutorials for your specific model. Most people can do this in 20 minutes.
Flame Sensor Faults
The Signs:
- Heater ignites briefly (0.5 seconds) then shuts down
- You hear a “whoosh” then silence
- System enters lockout
Most Likely Causes:
- Flame sensor is dirty (soot buildup blocks the sensor)
- Flame sensor is positioned wrong
- Flame sensor is defective
Quick Fixes:
- Clean the flame sensor (most common fix):
- Turn off power
- Locate the flame sensor (thin metal rod near the flame)
- Gently wipe with a cloth lightly dampened in white vinegar
- Let dry completely (important!)
- Retest
- Check flame sensor position:
- It should be positioned to “see” the flame directly
- If it’s bent away, carefully straighten it
- Retest
Spider Webs and Debris
The Signs:
- Ignition clicking sounds but very weak
- No ignition occurs
- You see visible webs or debris in burner area
The Fix:
- Turn off power
- Remove debris carefully
- Use a soft brush or compressed air (if you have it)
- Don’t touch igniter or flame sensor with hard tools
- Retest
⚠️ WARNING: Spiders love pool heaters because they trap insects nearby. After winter, I always spend 10 minutes clearing webs before startup.
Heater Runs But Water Doesn’t Warm
The heater is on and sounds normal, but your pool isn’t heating.
Dirty Filter / Low Flow
The Signs:
- Heater runs but pool temperature doesn’t increase
- Pressure gauge reads very high (above 20 PSI for above-ground systems)
- Water flow from return jets is weak
The Fix (This is #1 cause):
- Backwash the filter (5 minutes)
- Restart the heater
- Monitor pressure gauge, should drop to 10–15 PSI
- Water should warm noticeably within 15 minutes
Why this matters: Low flow through the heater prevents heating. Your gas heater can’t transfer heat to water that’s barely moving through the heat exchanger.
💡 Expert Tip: During spring, backwash your filter every 3–5 days for the first month. Pollen load is highest in spring.
Bypass Valve Issues
The Signs:
- Heater runs but no heat
- You can feel warmth at the heater outlet, but return jets are cold
This means: Your bypass valve is diverting water away from the heater.
The Fix:
- Locate your bypass valve (usually a 3-way valve near the heater)
- It should have a handle or dial
- Turn the handle toward the “heater” position (not “bypass”)
- Retest—water should warm within 5 minutes
⚠️ WARNING: Bypass valves are easy to set wrong. I see this mistake constantly. If the valve is wrong, you’re literally bypassing the heater.
Heat Exchanger Problems
The Signs:
- Heater runs, water flows, but no temperature increase
- You can feel some warmth at the outlet but it’s weak
Most Likely Causes:
- Heat exchanger is scaled (calcium buildup reduces efficiency 30–50%)
- Heat exchanger is cracked (rare but possible)
- Burner flames aren’t strong (needs professional service)
For Scaling (Common):
- This requires professional descaling (chemical process)
- Cost: $150–$300
- Can be prevented: soften your water or use scale-inhibitor chemicals
For Cracks (Rare):
- Not repairable, heater replacement needed ($500–$2,000)
- Look for: water inside the heater cabinet, white powder, weak heating
Thermostat Malfunction
The Signs:
- You set the thermostat to 78°F but heater keeps running past that temp
- Or: Heater shuts off too early (before reaching desired temp)
The Fix:
- Check if the thermostat dial is correct
- On digital models, verify the SET temperature vs ACTUAL temperature (should show on screen)
- If the difference is >5°F, the thermostat may be miscalibrated
- Try re-setting it—sometimes they need a reset
If it persists: Thermostat replacement is $50–$150 for the part, $200–$400 installed.
Error Codes at Startup
Different heater brands use different error codes. Here’s the full reference:
| Code | Brand | Meaning | DIY Fix | When to Call Pro |
|---|---|---|---|---|
| LO | Hayward | Low water pressure | ✓ Backwash filter | Persists after backwash |
| HL1 | Hayward | High limit switch open | ✓ Check water flow | Won’t clear |
| HL2 | Hayward | High limit switch still open | ✓ Restart system | Repeats |
| IGN | Hayward | Ignition failure | ✓ Clean igniter | Multiple failures |
| PRS | Hayward | Pressure switch fault | Maybe | Defective switch likely |
| EE | Hayward | Electronic error | ❌ | Circuit board issue |
| ERR HLS | Pentair | High limit switch issue | ✓ Check temp sensor | Won’t clear |
| ERR AFS | Pentair | Airflow switch issue | ✓ Check blower | Blower damage |
| ERR SFS | Pentair | Sensor fault | Maybe | Sensor defective |
| FL 2 | Jandy | Soft lockout | ✓ Wait 10 min, retry | Repeats immediately |
| CHECK FLOW | Jandy | Water flow issue | ✓ Backwash, re-prime | Circulation problem |
| FAULT-HIGH LIMIT | Jandy | High limit open | ✓ Check temp | Sensor fault |
Pro Tip: Write down the error code and search “[Your Heater Brand] [Error Code]” + YouTube. Most codes have simple fixes on video.
Water Leaking From Heater
This scares people, but most leaks are normal condensation.
Condensation vs Real Leak (How to Tell)
Condensation (Normal):
- Clear water (no color)
- Comes from underneath the heater
- Happens when heating cold water
- Stops once water reaches operating temperature
- Test: Use a chlorine test strip, it shows zero chlorine (condensation is fresh water)
Real Leak (Problem):
- Water drips from joints or cracks
- Colored water (has chlorine)
- Continues after water warms
- Test: Use a chlorine strip, it shows high chlorine (it’s pool water)
My Simple Test:
- Collect a small sample of the water
- Use a chlorine test strip
- If the strip shows chlorine, it’s a real leak
- If the strip shows zero, it’s condensation (normal, no action needed)
💡 Expert Tip: Expect condensation for the first 24–48 hours when heating cold spring water. If it’s still dripping after 72 hours, then investigate further.
Freeze Damage Assessment
If you notice water pooling inside the heater cabinet, you might have freeze damage.
Signs of Freeze Damage:
- Visible cracks in the heat exchanger
- Water inside the cabinet
- Water leaking from the drain plug area
- White powdery residue (rust oxidizing)
What to do:
- Don’t start the heater
- Call a professional for inspection
- Repair costs: $200–$600 if caught early, $2,000+ if it’s the heat exchanger
⚠️ WARNING: Operating a heater with a cracked heat exchanger is dangerous. Gas fumes can escape into the water. Get professional help immediately.
Gasket and O-Ring Failures
The Signs:
- Water leaks from unions or connections
- Leak is steady, not condensation drips
The Fix:
- Turn off the heater
- Locate the leaking connection
- Tighten the union (use two wrenches to avoid twisting the pipe)
- If tightening doesn’t work, the o-ring is damaged:
- Turn off heater and wait for cooling
- Loosen the union fully
- Remove the o-ring
- Replace with a new silicone o-ring (same size)
- Apply Magic Lube to the new o-ring
- Reassemble and tighten
Cost: ~$5 for the o-ring, 20 minutes of work.
GFCI Tripping at Startup
Your heater starts, then the GFCI outlet cuts power immediately.
Most Likely Causes
- Water is near the outlet (most common)
- Check if there’s water pooling or splashing near the GFCI
- Move any hoses or equipment away from the outlet
- Retest
- Circuit is overloaded
- Don’t run other equipment on the same circuit
- Unplug other devices nearby
- Retest
- Defective GFCI outlet
- Test the GFCI with the TEST button
- If it doesn’t trip with the TEST button, it’s defective
- Call an electrician for replacement ($50–$150)
- Ground fault in the heater wiring
- This is electrical and needs professional diagnosis
- Don’t attempt DIY fixes
⚠️ WARNING: A GFCI that trips repeatedly is a sign of a real electrical problem. Keep it off until fixed.
Unusual Noises at Startup
Banging/Clanging
- Most likely: Air in the lines
- Fix: Run the circulation pump for 5 minutes to purge air
- Continues: Water hammer effect—ask a plumber to install a water hammer dampener
Hissing/Whistling
- Most likely: High-pressure gas line
- Fix: Check gas pressure (should be 5–7 inches water column)
- Continues: Gas regulator needs adjustment (professional)
Screeching/Squealing
- Most likely: Bearings in the pump need lubrication
- Fix: Run the pump for 10 minutes, often clears itself
- Continues: Pump bearing replacement (~$300–$500)
💡 Expert Tip: A little noise on startup is normal. Once things warm up and air purges, it usually quiets down.
Heat Pump Specific Issues
Won’t Start Below 50°F
- Reason: This is by design, heat pumps can’t function below 50°F
- What to do: Wait for warmer weather
- Workaround: None, forcing it will damage the compressor
Icing on Coils
- Reason: Rare in spring, but can happen on cold mornings
- Signs: Frost buildup on the outdoor unit
- Duration: Usually melts by mid-morning
- Fix: Don’t force it, let the sun warm it up
Low Refrigerant Signs
- Signs: Unit runs but barely warms the water, even on warm days
- Cause: Refrigerant leak (rare but possible)
- Fix: Professional service needed ($500–$1,000)
- Prevention: Annual professional service catches this early
Understanding Condensation vs Leaks in Spring
This section deserves its own space because it causes so much unnecessary panic and expense.
Why Condensation Happens
When you heat cold water (50–60°F), the temperature difference between the cold water inside the heater and the hot metal exterior causes condensation, like a cold glass of water on a summer day.
This is not a leak. This is physics.
How Much Condensation is Normal?
Expect dripping for:
- First 12 hours: Heavy drips (1–2 drips per second)
- 12–48 hours: Moderate drips (1 drip per 2–5 seconds)
- 48–72 hours: Light drips (occasional)
- After 72 hours: Should stop (or significantly reduce)
If it’s still dripping heavily after 72 hours, it might be a real leak.
The Chlorine Test Method
This is your definitive test:
- Get a chlorine test strip (from your pool kit)
- Collect a small sample of the dripping water in a cup
- Dip the test strip in the water
- Wait 10 seconds
- If the strip shows HIGH chlorine (like 2–4 ppm): Real leak (pool water)
- If the strip shows ZERO chlorine: Condensation (fresh water)
Why this works: Condensation is distilled water (zero chlorine). Pool water has chlorine. This test is foolproof.
When to Worry About a Real Leak
Real leaks:
- Come from joints or cracks (not underneath)
- Have chlorine in them (test strip proves it)
- Continue for days/weeks
- Get worse over time
Real leak solution:
- Stop running the heater
- Call a professional for diagnosis
- Repair costs vary ($100–$2,000+ depending on location)
Flow Rate and Bypass Valve Setup for Spring
This section matters. I’ve seen incorrect bypass valve settings cost homeowners $1,000+ in repairs.
Minimum Flow Rate Requirements by Heater Type
Your heater needs a minimum water flow to protect the heat exchanger.
Gas Heaters: 25–40 GPM
- Most above-ground gas heaters need at least 25 GPM
- If flow drops below this, the heater will overheat
- High-limit switch will shut the heater down
Heat Pumps: 30–70 GPM
- Depends on the model
- Most above-ground heat pumps: 30–50 GPM minimum
- Check your manual for exact spec
How to Check Your Flow Rate
Method 1: Pressure Gauge
- Normal operating pressure: 10–15 PSI
- High pressure (>20 PSI): Filter is dirty, backwash
- Zero pressure: Pump isn’t running or suction line is blocked
Method 2: Visual Flow Check
- Feel the return jet water force
- Should be a strong, steady stream
- Weak stream = filter problem or blockage
Method 3: Professional Testing
- A pro can measure actual GPM with a flow meter
- Cost: $50–$150
Bypass Valve Purpose and Adjustment
When to Use Bypass
- Winter: Bypass the heater to prevent ice damage
- Spring/Fall: Keep heater on circulation path (don’t bypass)
- Summer: Keep heater on circulation path
- If water is too warm: Some systems allow partial bypass to cool
Correct Settings for Heating Season
Your bypass valve (usually a 3-way ball valve) should be set to:
- Fully toward the heater (pool → heater → back to pool)
- NOT partially toward bypass (this splits flow)
- Check the valve handle position:
- Handle parallel to the hose = HEATER setting (correct)
- Handle perpendicular = BYPASS setting (wrong for heating)
Common Bypass Mistakes
Mistake #1: Valve is partially open to both heater and bypass
- Result: Cold water mixed with warm water
- Your symptom: Heater runs but pool barely warms
Mistake #2: Valve is completely toward bypass (no flow to heater)
- Result: Zero water through heater
- Your symptom: Heater runs but no warmth at all
Mistake #3: Valve is stuck and won’t move
- Result: You can’t control flow direction
- The fix: WD-40 on the valve handle, gentle rocking (don’t force it)
💡 Expert Tip: After the first heating season, take a photo of your correct bypass valve position and label it with tape. This helps you avoid mistakes next year.
Spring Maintenance Tasks to Extend Heater Life
The goal: Get 10–15 years from a gas heater, 12–20 years from a heat pump.
Monthly Maintenance During Season
Every month (or every 4 weeks), do this 5-minute check:
- Pressure gauge is 10–15 PSI (not zero, not >20)
- No visible leaks from unions or connections
- No unusual noises
- Water is flowing normally from return jets
- Heater cabinet is dry (no pooling water)
- Vent openings are clear
Annual Professional Service Recommendations
Once a year (ideally fall, before winterization), get a pro to:
- Clean the heat exchanger (if scaling is visible)
- Inspect the burner assembly (gas heaters)
- Check gas pressure and combustion efficiency (gas heaters)
- Inspect for corrosion or cracks
- Test the high-limit switch
- Check refrigerant charge (heat pumps)
- Inspect the compressor condition (heat pumps)
Cost: $150–$400 depending on the heater
Why it matters: This catches small problems before they become $1,000+ repairs.
Component Replacement Schedule
Plan on replacing these items:
| Component | Lifespan | Cost | Difficulty |
|---|---|---|---|
| Igniter | 3–4 years | $50–$100 | Easy (DIY) |
| Flame Sensor | 4–5 years | $50–$100 | Moderate |
| Pressure Switch | 5–7 years | $75–$150 | Moderate |
| Capacitor | 5–8 years | $20–$50 | Easy (DIY) |
| O-Ring Kits | 2–3 years | $10–$30 | Easy (DIY) |
| Heat Exchanger | 10–15+ years | $500–$2,000 | Professional only |
Energy-Saving Tips for Spring Heating
Spring heating costs money. Here’s how to minimize it.
Optimal Temperature Settings
- Health/Comfort Standard: 78–82°F (American Red Cross recommends 78°F)
- Every 1°F increase: +10–30% energy cost
- Setting: Start at 78°F, increase only if absolutely necessary
The math: Heating from 70°F to 78°F uses maybe $2–$3 in gas per day. Heating to 85°F costs $5–$8 per day.
Best Times to Run Your Heater
- Heat pump: Run during daytime (warmer air = better efficiency)
- Gas heater: Run anytime (efficiency doesn’t vary much)
- Solar heater: Only daytime (sun heats during the day)
Pro tip: Use a timer to heat before you use the pool, not 24/7.
Pool Cover Benefits
A solar cover or dark tarp over the pool:
- Reduces heat loss: 50–70% overnight retention
- Reduces heating cost: ~30% reduction overall
- Reduces chemical demand: 20–30% reduction
Payback: A $50 solar cover pays for itself in 1–2 weeks of heating.
Heat Pump Efficiency Tips
- Run on low settings in spring (aim for 1–2°F increase per hour, not faster)
- Use a pool cover at night to lock in heat
- Don’t try to heat to 85°F+ in spring (costs too much, inefficient)
- Wait until air is 60°F+ before running the heat pump
Safety Warnings: What NOT to Do at Spring Startup
These mistakes can void warranties, cause injuries, or cost thousands.
Never Use Open Flame for Gas Leak Testing
⚠️ CRITICAL: Only use soapy water.
- Never use a lighter, match, or torch
- Never use a stove burner to “sniff test”
- Never assume “I’ll just try once”
Why: Gas + open flame = explosion. No exceptions.
Don’t Start Heater Before Water is Balanced
⚠️ WARRANTY VOID ALERT: Starting a heater with imbalanced water:
- Voids most manufacturer warranties
- Damages the heat exchanger
- Can cost $500–$2,000 in repairs
- Is completely preventable
The rule: Wait 24 hours after shocking the pool. Test with a kit. Start the heater only when chemicals are balanced.
Don’t Ignore Error Codes
Error codes exist for a reason. They protect your equipment.
- Don’t just turn the heater back on and hope
- Write down the code
- Look it up
- Address the underlying problem
Ignoring errors turns $50 fixes into $500+ repairs.
Don’t Run Pump Dry
Running the pump without water destroys the seal in 30 seconds flat.
Before turning on the pump:
- Pool is filled to proper level
- Pump basket is primed (filled with water)
- Circulation line is full of water
If you hear a rattling sound: Turn off immediately. You’re sucking air.
Don’t Use Petroleum-Based Lubricants
Only use: Magic Lube II or Jack’s 327 (silicone-based)
Never use:
- Vaseline
- Petroleum jelly
- WD-40 (for o-rings)
- Plumber’s grease
Why: Petroleum products swell and destroy silicone seals. A destroyed seal = replacement cost ($100–$300).
Saltwater Pool Heater Spring Considerations
If you have a saltwater chlorine generator (SWG) system, your heater needs extra attention.
Corrosion Inspection Points
Saltwater is extremely corrosive to metal.
- Gas line connections are not pitting
- Copper fittings show no green oxidation (light is OK, heavy is not)
- Heat exchanger shows no white powder (scale from salt)
- Cabinet exterior has no rust spots
Titanium vs Copper Heat Exchanger
- Titanium: Resists saltwater corrosion (preferred for SWG pools)
- Copper: More susceptible to corrosion
- Stainless steel: Middle ground
If you’re upgrading: Choose titanium for saltwater pools. It lasts longer.
Check Valve Importance
A check valve in the return line is essential for saltwater systems:
- Prevents the SWG chlorine cell from corroding the heater
- Cost: $20–$40
- Lifespan: 2–3 years
- Replace annually in saltwater pools
Intex and Soft-Sided Pool Heater Startup
Intex (and other soft-sided) pools have special heater considerations.
Special Considerations for Soft-Wall Pools
- Water level fluctuates (can drop 1–2% per day)
- Pressure is lower than hard-sided pools
- Some heaters aren’t compatible with soft-sided pools
Compatible Heater Types
- Intex heaters: Designed for Intex pools (buy the same brand)
- Above-ground gas heaters: Usually work but check specs
- Electric heaters: Safe for soft-sided pools
- Heat pumps: Check manufacturer (not all compatible)
Pressure Limitations
Soft-sided pools can’t handle high pressure:
- Max pressure: Usually 1.5–2 PSI
- Hard-sided pools: Can handle 15–20+ PSI
- Danger: High pressure ruptures the wall
What to do: Use a pressure relief valve set to 1.5 PSI if needed.
FAQ: Above Ground Pool Heater Spring Startup
1. When should I turn on my pool heater in spring?
Answer: When daytime temps are consistently above 70°F AND your pool water is chemically balanced. This typically happens in mid-March (South), mid-April (Central), and late April–May (North).
2. What order should I start my pool equipment?
Answer: (1) Pump/circulation first for 5+ minutes, (2) Filtration running, (3) Then heater. Never start the heater before circulation is established.
3. Why won’t my heater turn on after winter?
Answer: Most common: GFCI tripped, breaker off, thermostat set wrong, dirty filter, or safety lockout. Check these in order.
4. Is condensation normal when starting my heater?
Answer: Yes, for the first 24–48 hours. Use the chlorine test strip method to confirm it’s water (no chlorine = normal condensation). If it continues past 72 hours, you might have a real leak.
5. What temperature should I set my pool heater to?
Answer: 78–82°F is ideal for health and comfort. Each 1°F increase costs 10–30% more in energy.
6. How long does it take to heat a pool in spring?
Answer: Depends on heater size, starting water temp, and outside air temp. Expect 1–2°F increase per hour for gas heaters, 0.5–1°F per hour for heat pumps.
7. Should I run my heat pump when it’s 50°F outside?
Answer: Yes, heat pumps work at 50°F but efficiency is poor. Wait for 60°F+ if possible. Don’t run below 50°F, the compressor won’t ignite.
8. How do I test for gas leaks?
Answer: Soapy water ONLY. Mix 1 part dish soap with 9 parts water in a spray bottle. Spray all gas connections. Bubbles = leak. If you see bubbles, turn off the gas and call a pro.
9. What does error code LO mean?
Answer: Low water pressure. Usually the filter is dirty. Backwash the filter and the error should clear.
10. Can I damage my heater by starting it wrong?
Answer: Yes. Running the pump dry (30 seconds), starting before water is balanced, or wrong bypass valve setting can cost $500–$2,000 in damage.
11. Do I need a professional for spring startup?
Answer: First-time startup? Recommended. Gas leak test? Professional only. Everything else? Confident DIY owners can handle it.
12. How do I know if my heat exchanger is cracked?
Answer: Water pooling inside the heater cabinet or high chlorine reading in the dripping water. Don’t operate if cracked, gas can escape.
13. What is a bypass valve and do I need one?
Answer: A bypass valve lets you send water around the heater. Essential for winter protection. In spring, set it fully toward the heater (not bypass).
14. How do I prime my pool pump?
Answer: Fill the pump strainer basket with pool water. Open the drain valve on the basket, fill, close drain, turn on pump. Should establish pressure within 2–3 minutes.
15. Should I balance water before starting the heater?
Answer: Absolutely. Unbalanced water damages the heat exchanger and voids warranties. Wait 24 hours after shocking before starting the heater.
16. How often should I replace my heater igniter?
Answer: Every 3–4 years of regular use. Cost: $50–$100 for the part, DIY installation takes 20 minutes.
17. What’s the minimum flow rate for my heater?
Answer: Gas heaters: 25–40 GPM. Heat pumps: 30–70 GPM. Check your manual for exact specs.
18. Can I use Vaseline on O-rings?
Answer: No. Only silicone-based lubricant (Magic Lube, Jack’s 327). Vaseline destroys seals.
19. Why does my GFCI trip when I start the heater?
Answer: Water near the outlet, circuit overload, or defective GFCI outlet. Move equipment away, test the GFCI, or replace if defective.
20. How do I winterize my heater properly?
Answer: Drain water from heater, plug all openings, insulate pipes, cover the unit, remove gas line plugs (don’t seal them). Reverse this process for spring startup.
Spring Startup Checklist (Printable)
Pre-Startup Inspection
- Pool cover removed and stored
- Large debris removed from water surface
- Skimmer basket emptied
- Pump strainer basket emptied
- Heater cabinet is clean and dry
- Heater vent clearings are 3+ feet on all sides
- No gas smell detected
- No visible cracks in heater cabinet
- No water pooling inside heater
Equipment Assembly
- Drain plugs reinstalled (with fresh Teflon tape)
- All unions tightened (hand-tight + half turn with wrench)
- O-rings lubricated (silicone-based only)
- Hoses reconnected securely
- Gas line inspected (no corrosion)
- Electrical connections tight and dry
Water Preparation
- Pool filled to 75% skimmer level
- Pump primed and running (5+ minutes)
- Filter pressure normal (10–15 PSI)
- Alkalinity balanced (80–120 ppm)
- pH balanced (7.2–7.6)
- Calcium hardness balanced (200–400 ppm)
- Shock added (if needed)
- Waited 24 hours after shocking
Gas Heater Specific
- Gas shutoff valve fully open
- Burner area free of debris and spider webs
- Flame sensor clean (vinegar wipe if needed)
- Igniter clean and positioned correctly
- Ventilation clearance verified (3+ feet)
- Gas leak tested (soapy water)
- Pressure gauge reading normal
Heat Pump Specific
- Ambient temperature above 50°F
- Coil fins clean and not bent
- Condensation drain clear
- Refrigerant lines intact (no oily residue)
- Thermostat in HEAT mode (not cool)
Electrical Safety
- GFCI outlet tested (TEST button works)
- GFCI outlet has power (lights on if applicable)
- Main breaker in ON position
- Heater power switch ready
Bypass Valve & Flow
- Bypass valve set to HEATER position (handle parallel to hose)
- Water is flowing from all return jets
- Pressure gauge shows 10–15 PSI
- No unusual sounds from circulation
Final Startup
- Thermostat set to desired temperature (78°F)
- Heater power switched ON
- Listened for normal startup sounds
- Monitored for 30 minutes
- No error codes or alarms
- Water warming normally
- No leaks or unusual issues
Post-Startup (First 24 Hours)
- Checked heater again after 8 hours
- Water temperature monitored
- No condensation after 24 hours (or confirmed it’s normal with chlorine test)
- Pump and filter running smoothly
- No GFCI trips or breaker trips
- Recorded startup date and initial water temp in log
When to Call a Professional
Know your limits. Some problems are DIY. Some require a pro.
Gas Line Issues
Call a pro if:
- You suspect a gas leak
- Smell gas around the heater
- Gas pressure is incorrect (won’t return to normal)
- Gas line shows corrosion or pitting
- Safety first: Gas is dangerous.
Electrical Problems
Call a pro if:
- GFCI trips repeatedly (won’t reset)
- Breaker keeps flipping
- You see burn marks around connections
- Water is near electrical connections
- Safety first: Electricity + water = serious hazard.
Persistent Error Codes
Call a pro if:
- Error code returns after you fix the obvious problem
- Multiple error codes appear
- Heater won’t ignite after 2 attempts
- Why: Repeated errors often signal deeper issues.
Freeze Damage Suspected
Call a pro if:
- You see cracks in the heat exchanger
- Water is pooling inside the heater cabinet
- Water inside has chlorine (isn’t condensation)
- Why: Operating a cracked heater is dangerous.
Warranty Concerns
Call a pro if:
- You’re worried about voiding your warranty
- You’re uncertain about a repair
- The heater is still under warranty
- Why: Warranty claims are easier with professional documentation.
Conclusion
After 20 years of spring startups across every US climate zone, I can tell you this: The owners who succeed are the ones who take 2–3 hours for a proper startup.
Yes, it takes time. Yes, it’s detailed. But that investment of time today prevents $1,000+ in repairs tomorrow.
Here’s what I want you to remember:
- Timing matters. Wait for consistent warmth and balanced water.
- Sequence matters. Follow the 6 steps in order, don’t skip ahead.
- Inspection matters. Take 20 minutes to inspect before startup.
- Water balance matters. Start the heater with balanced water or void your warranty.
- Real leaks are rare. Most spring dripping is normal condensation.
You’ve got this. Follow this guide, use the checklists, and you’ll have a smooth spring heating season.
And if something doesn’t feel right? That’s what professionals are for. Sometimes a $150 service call prevents a $2,000 problem.
Happy heating.
Related Articles
- Winterize Your Pool Heater: Complete Guide
- Pool Heater Not Working: Complete Troubleshooting Guide
- Above Ground Pool Opening: Step-by-Step Guide
- Best Above Ground Pool Heat Pumps for 2026
- Heat Pump vs Gas Heater: Which is Better?
Have questions about spring startup? Ask in the comments below. I review every question personally.