Above ground pool heater fall closing (also called winterization) is the process of safely shutting down, draining, and protecting your pool heater before freezing temperatures arrive. Proper winterization prevents water from freezing inside the heater’s components, which can crack the heat exchanger, damage headers, and cause leaks costing $800 to $2,000+ in repairs.
Learn how to safely close and winterize your above-ground pool heater this fall. Expert step-by-step guide covers gas, heat pump, solar & electric heaters. Prevent freeze damage and save $800-$2,500 in repairs.
Table of Contents
Why Winterizing Your Above-Ground Pool Heater Matters More Than You Think
The cost of NOT winterizing your above-ground pool heater can be devastating. Water left inside heat exchangers, pipes, and filters freezes, expands 9%, and cracks expensive components. A single crack in your heat exchanger can cost $800-$1,500 to repair. Widespread freeze damage across your entire system? $5,000-$20,000+ in replacements.
But here’s the good news: Proper winterization takes just 1-2 hours and costs almost nothing. Yet most pool owners either skip it entirely or do it incorrectly.
⚠ WARNING: One Reddit pool owner shared a cautionary tale: “My first year as a pool owner sucked. 20k for filter replacement and freeze damage. Quote for repairs started at $7500. After 2 days it was $20k.” Don’t let this be you.
This guide covers every heater type, every climate zone, and every mistake to avoid. Whether you have a gas heater, heat pump, solar collector, or electric resistance heater, you’ll find specific instructions to protect your investment.
When Should You Close Your Above-Ground Pool Heater? The Critical Timing Window
The Golden Rule: Water Temperature Below 60°F
Close your heater when your pool water temperature drops below 60°F and is dropping consistently. This typically occurs in mid-to-late September in northern climates and November-December in warm climates.
Don’t judge timing by the calendar. Judge it by water temperature. A sudden cold front in October can drop your water from 70°F to 45°F overnight in some regions, but a warm-climate pool might stay above 60°F until December.
Before the First Hard Freeze
A hard freeze is when outdoor air temperatures stay below 32°F for an extended period (typically 6+ hours). Once hard freezes begin in your area, winterize immediately if you haven’t already.
The urgency: Even a few nights of freezing can cause catastrophic damage. Water in stagnant pipes, filters, and heat exchangers freezes before you realize it’s a problem.
Regional Winterization Timing Guide
| Climate Region | First Hard Freeze Date | Recommended Close-By Date | Water Temperature Threshold |
|---|---|---|---|
| Upper Midwest (MN, WI, MI) | Late September–Early October | Mid-September | Below 60°F (usually by Aug-Sept) |
| Northeast (NY, PA, MA) | Early October | Late September | Below 60°F (usually by late Sept) |
| Northern Plains (ND, SD, NE) | Early October | Mid-September | Below 60°F (usually by early Sept) |
| Mid-Atlantic (OH, IN, IL) | Mid-October | Early October | Below 60°F (usually by Sept-Oct) |
| Mountain West (CO, UT, WY) | Late September–Early October | Mid-September | Below 60°F (highly variable by elevation) |
| Mid-South (KY, TN, AR) | Late October–Early November | October | Below 60°F (usually by late Oct) |
| Upper South (MD, VA, WV) | Late October–Early November | October | Below 60°F (usually by late Oct) |
| Texas (North/Central) | November | November | Below 60°F (usually by late Oct-Nov) |
| Southeast (GA, SC, NC) | Late October–Early November | November | Below 60°F (usually by late Oct-Nov) |
| Southern/Coastal (FL, LA, Southern CA) | No hard freeze or Late December+ | December (or as needed) | Below 60°F (may not occur) |
💡 PRO TIP: Set a phone reminder for your region’s “first hard freeze date minus 2 weeks.” This gives you a 2-week buffer to winterize before the critical window closes. In unpredictable climates (Texas, California), check your weather forecast weekly in September-November and winterize when cold fronts appear.
Identifying Your Heater Type: The First Step to Proper Winterization
Different heater types require different winterization procedures. You need to know what you’re working with before starting.
Gas Heaters (Propane or Natural Gas)
Gas heaters use a combustion chamber to heat water. They’re the most common above-ground pool heater and require careful shutdown of gas lines.
- Look for a burner chamber visible through a window, or a control panel with temperature/gas controls
- Usually mounted on equipment pad with a gas line running from heater to propane tank or natural gas line
- Control board or dial showing temperature settings
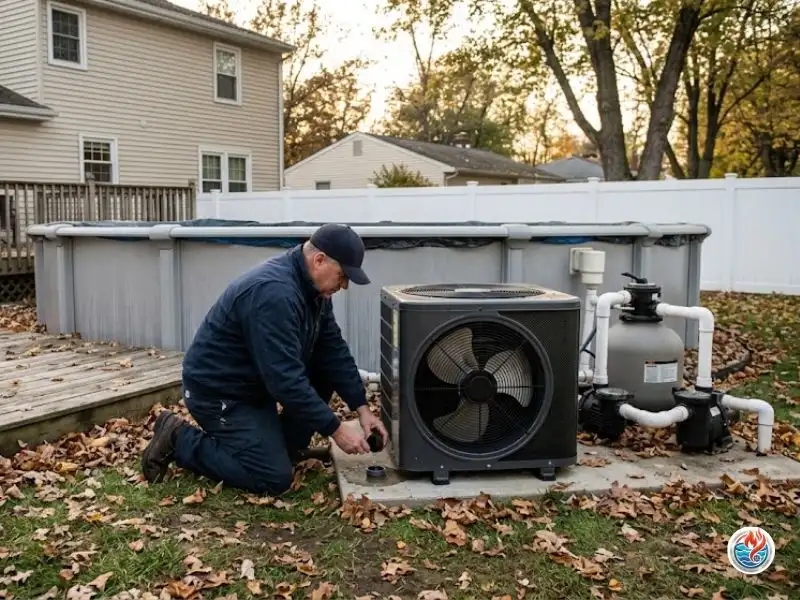
Heat Pumps (Air-Source or Ground-Source)
Heat pumps extract warmth from air or ground and transfer it to water. They’re energy-efficient and becoming increasingly popular for above-ground pools.
- Large fan visible on top, similar to an air conditioning unit
- Control panel with digital readout and on/off switch
- Usually quieter and more complex than gas heaters
Solar Pool Heaters
Solar heaters use roof-mounted collectors to absorb sunlight and warm water passively. They’re low-maintenance but still need winterization care.
- Collectors mounted on roof or ground, typically dark-colored panels
- Control valve (usually 3-way diverter) directing water through collectors or bypassing
- Minimal electrical components (mostly mechanical)
Electric Resistance Heaters
Electric heaters use heating elements submerged in water or attached to pipes. Less common for above-ground pools but still found in some installations.
- Looks like a metal box with electrical connections
- May have heating element visible in the flow path
- Control panel powered by 240V electrical circuit
Not sure which type you have? Check your equipment manual or search for your model number online. Most manufacturers provide winterization guides on their websites (Raypak, Hayward, Pentair, FibroPool are common above-ground heater brands).
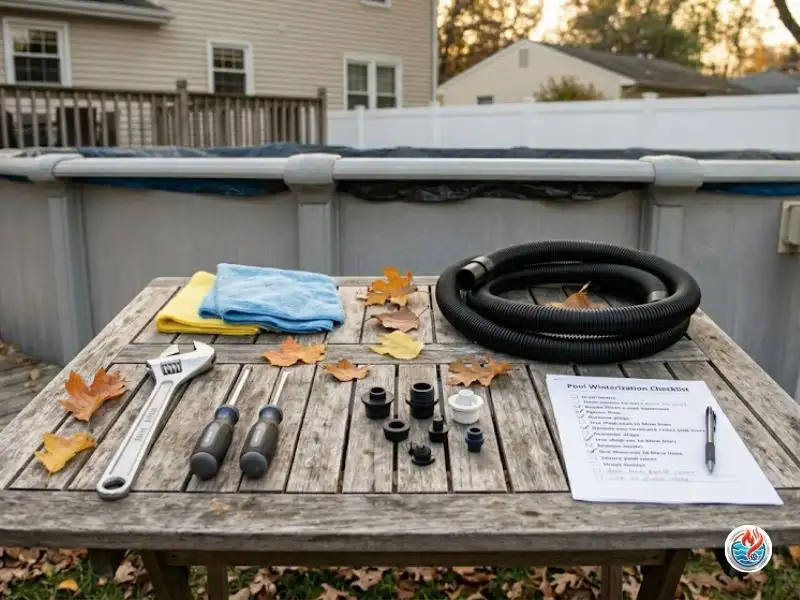
Essential Tools and Supplies You’ll Need
| Item | Purpose | Cost | Where to Buy |
|---|---|---|---|
| Adjustable Wrench Set | Remove drain plugs, bypass valve connections | $15-$30 | Hardware store, Amazon |
| Screwdrivers (Phillips & Flathead) | Disconnect pump/filter drain valves, cover heater vent | $10-$20 | Hardware store |
| Shop Vacuum | Blow air through lines to remove residual water | $50-$100 (one-time investment) | Home Depot, Lowe’s |
| Plywood Sheet (optional) | Cover heater vent to prevent debris/snow buildup | $10-$20 | Home Depot, Lowe’s |
| Drain Pan (5-gallon) | Catch water from drain plugs | $5-$10 | Hardware store |
| Towels/Rags | Dry components, wipe excess water | $5 (use old rags) | Home |
| Antifreeze (RV type, optional) | Protect pipes in extreme climates | $20-$40 | Auto parts store, Amazon |
| Pool Heater Bypass Valve (if needed) | Divert water around heater during winter | $30-$80 | Pool supply store |
💡 PRO TIP: Many pool owners already own a shop vacuum from other home projects. If you don’t have one, borrow from a friend or neighbor. This is the most useful tool for proper winterization because it removes residual water that would freeze in low spots.
Step-by-Step Winterization for Gas Pool Heaters
Gas heaters are the most common above-ground pool heater type. These steps apply to propane and natural gas heaters like Raypak, Pentair, and Hayward models.
Step 1: Turn Off the Heater (48 Hours Before Closing)
Stop running the heater 48 hours before you plan to winterize. This allows the heater to cool completely and gives internal components time to stabilize.
Step 2: Turn Off Gas Supply at TWO Points
- Close the valve on the gas heater itself (usually a knob or handle on the control side of the heater)
- Close the valve at the propane tank or natural gas line (turn clockwise until tight)
⚠ WARNING: Failure to turn off BOTH valves is a safety hazard. Gas can leak from the heater during winter and create an explosion risk when you restart in spring. Many seasoned pool owners recommend taking a photo of these valve locations before closing season.
Step 3: Turn Off Electrical Power
Switch off the breaker to the heater on your home’s electrical panel. Label it clearly so no one accidentally turns it back on during winter.
Step 4: Locate and Open Drain Plugs
This is where most DIYers make mistakes. Many gas heaters have TWO drain plugs: one on the bottom and one on the side. Missing the second one leaves water trapped inside.
- Bottom drain plug: Usually located directly underneath the heater where the pump connects
- Side/header drain plug: Often on the opposite side of the heater from the inlet/outlet pipes
- Filter drain plug: If you have a sand or cartridge filter attached, drain it too
Consult your heater’s manual or take a close look at the heater body. Modern heaters usually have these plugs color-coded or clearly labeled.
💡 PRO TIP: Place all drain plugs in your pump basket immediately after removing them. This prevents losing them in the grass or mistakenly throwing them away. Take a photo of the drain locations with your phone for next spring’s reopening.
Step 5: Set the Bypass Valve to BYPASS Position
If your system has a bypass valve (a 3-way valve near the heater), set it so water flows AROUND the heater, not through it. This is critical for preventing freeze damage inside the heat exchanger.
The bypass valve has three positions:
- Heater: Water flows through the heater (normal operation)
- Bypass: Water flows around the heater (winterization position)
- Closed: No water flows (used for maintenance)
⚠ WARNING: A common winterization mistake is leaving the bypass valve in the wrong position. The Reddit consensus is clear: “Leave bypass OPEN (water flows around heater, not through it) during winterization.” Double-check your valve position before sealing everything up.
Step 6: Blow Out All Lines with Compressor or Shop Vac
After draining, residual water remains in pipes. Use a shop vacuum or air compressor to push this water out.
- Connect shop vac hose to the heater’s return line (outlet where water exits toward the pool)
- Hold the hose firmly in place for 5+ minutes to create suction
- Alternatively, use an air compressor at moderate pressure (40-60 PSI) for 5+ minutes per line
- Listen for water dripping out of the pump inlet (where water enters from the pool)
This step is tedious but absolutely essential. A Reddit pool owner shared: “I have blown out the lines as usual… shoved a shop vac down the pipes to suck out any water.” This preventative step saved their system from freeze damage.
Reddit
Step 7: Disconnect Heater from Pump (Optional But Recommended)
For extra protection, physically disconnect the heater from the pump and filter system. This prevents any residual water from entering the heater if winter moisture settles in your pump.
Most heaters connect via threaded union fittings (large hex nuts on inlet/outlet pipes). Use a wrench to disconnect these fittings. Cap the open connections with threaded caps or pool winterization plugs.
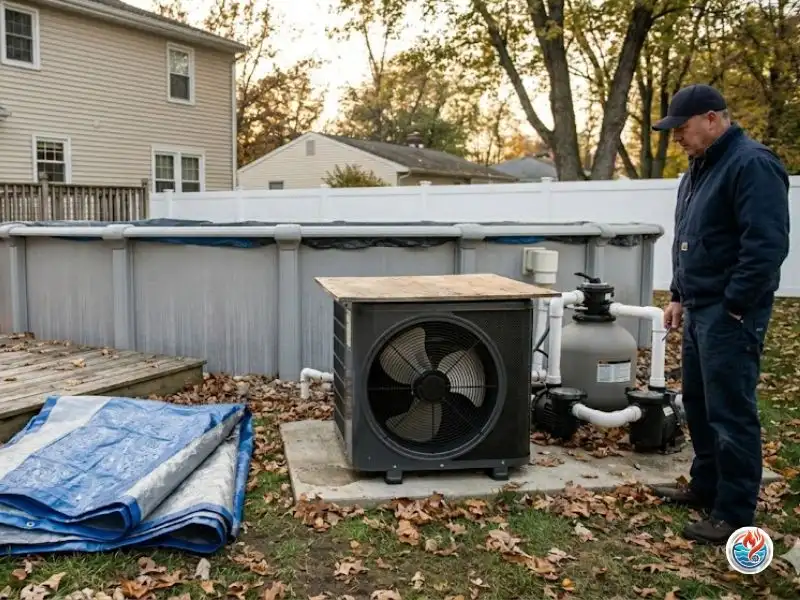
Step 8: Do NOT Wrap with a Tarp (This Is Critical)
Resist the urge to protect your heater with a tarp. This is one of the most common winterization mistakes, and Reddit experts are vocal about it:
“Don’t cover your equipment. It will attract rodents and trap moisture. Plywood sheet over fan grill ONLY to prevent debris/snow buildup.”
– Pool technician consensus, r/pools
Instead, place a piece of plywood over the top to prevent leaves and snow from accumulating on the fan and intake. This allows moisture to escape while protecting components.
Step 9: Store Drain Plugs Safely
Label a plastic bag with Pool Heater Drain Plugs – Spring 2027 and store all plugs in your equipment shed. Losing these plugs means expensive replacements when you reopen.
Step 10: Document Everything
Take photos of:
- All drain plug locations before removing them
- Bypass valve in BYPASS position
- Disconnected union fittings
- Drain plugs stored safely
Keep these photos with your pool heater manual for spring reopening reference.
Step-by-Step Winterization for Heat Pumps
Heat pumps are more complex than gas heaters and require special care. Here’s the proper procedure:
Step 1: Set Heat Pump to OFF Mode (Not Standby)
Heat pumps have different modes. Find the OFF or WINTER mode on your control panel and set it there. Do NOT leave it on STANDBY or HEATING mode, as the compressor may cycle on during unexpected warm spells.
Step 2: Turn Off Electrical Power
Switch off the breaker to the heat pump on your home’s electrical panel. Heat pumps are sensitive electrical devices; complete power disconnection protects against surges.
Step 3: Drain Water from Heat Exchanger
Heat pumps have an internal heat exchanger that must be drained completely. Locate the drain plugs (usually two) and use the same wrench method as gas heaters.
Step 4: Blow Out Lines (Extended Duration)
Heat pump systems often have longer pipe runs than gas heaters. Blow out all lines for 7-10 minutes with a shop vac or air compressor to ensure complete water removal.
Step 5: Disconnect Heater from System (Recommended)
Physically disconnect the heat pump to prevent ice formation in the heat exchanger during extreme cold. Use union fittings (hex nuts) to separate inlet and outlet connections.
Step 6: Do NOT Store Indoors
Unlike some portable equipment, heat pumps must stay outside. They’re designed to withstand winter weather. Storing indoors can trap moisture and damage internal components.
Step 7: Protect Against Debris (Plywood Only)
Place a plywood sheet over the top fan intake to prevent leaves and snow from entering. Do NOT wrap the entire unit in a tarp; moisture accumulation causes corrosion.
“Never cover your heat pump with a tarp. The moisture will destroy it. A piece of plywood over the intake is all you need.”
– HVAC technician, r/pools
Step-by-Step Winterization for Solar Pool Heaters
Solar heaters are less temperature-sensitive than gas or electric heaters, but winterization is still necessary in cold climates.
Step 1: Drain the Collector Panels
Solar collectors contain water that will freeze in cold climates. Locate the drain valves (usually at the bottom of the collector) and open them to drain completely.
Step 2: Close the Diverter Valve
Your solar system has a 3-way diverter valve. Set it to the CLOSED position to prevent water from flowing through the collectors during winter.
Step 3: Blow Out Collector Lines
Use a shop vac or air compressor to blow out the lines connecting the roof collectors to the pump. Residual water in these lines will freeze and crack the tubing.
Step 4: Check for Leaks Before Winter
Solar systems are prone to leaks, especially after years of UV exposure. Inspect all connections for cracks or leaks before sealing everything up for winter.
Step 5: Disable System Circulator Pump
Turn off the electrical breaker to the solar pump. Set any automated controls to OFF or WINTER mode.
Step 6: Clean Collectors Before Closing
Use a soft brush or cloth to remove leaves, dirt, and debris from the collector panels. This prevents clogging and extends the life of the system.
Step-by-Step Winterization for Electric Pool Heaters
Electric heaters are simpler to winterize than gas or heat pump systems. Follow these steps:
Step 1: Turn Off Electrical Power
Switch off the breaker to the heater on your home’s electrical panel. Electric heaters should have zero power during the off-season.
Step 2: Drain Water from Heating Element
Locate the drain plug on the bottom of the electric heater unit and open it fully. Allow all water to drain into a bucket.
Step 3: Blow Out Connected Pipes
Use a shop vac or air compressor to remove residual water from pipes connected to the heater. This is especially important if pipes run below ground level.
Step 4: Disconnect if Possible
If the heater is mounted on PVC unions, disconnect it from the system. Cap the open connections with threaded caps.
Step 5: Protect Electrical Connections
Cover the electrical terminal box with a small plastic bag or waterproof cover to prevent moisture from entering. Secure with a rubber band.
Step 6: Store Drain Plug Safely
Label and store the drain plug with your other winterization materials for spring reopening.
The Bypass Valve Debate: To Bypass or Not to Bypass?
A bypass valve is a 3-way directional valve that allows water to flow either through the heater or around it. The question: should you use bypass mode during winterization?
The Case FOR Using Bypass During Winter
- Prevents freeze damage: Water flowing around the heater (not through it) keeps the heat exchanger completely empty
- Maintains circulation: Your filter and pump can still run if you leave the system on low during mild winter days
- Protects heat exchanger: No water = no freeze risk = no cracked tubing
The Case AGAINST Using Bypass (Manual Shutdown)
- Simpler: Turn everything off, drain it all, disconnect it. No need to worry about bypass valve position
- Safer: Zero risk of accidentally forgetting to switch to bypass mode
- Less maintenance: Completely shut-down systems require less active management
The Expert Consensus
Most certified pool technicians recommend combining both approaches:
- Drain the heater completely
- Set the bypass valve to BYPASS position (as insurance)
- Turn off the pump and filter
- If you decide to run the pump occasionally on mild winter days (for circulation), keep the bypass OPEN so water never enters the heater
💡 PRO TIP: Many pool owners set the bypass valve to BYPASS and then turn off the entire system (pump, filter, heater). This “dual protection” approach means even if someone accidentally restarts the system, water won’t flow through the heater. It’s the safest winterization strategy.
Common Winterization Mistakes to Avoid
Mistake #1: Leaving Water Inside the Heater
This is the #1 cause of freeze damage. Water left in heat exchangers freezes, expands, and cracks the tubes. A single crack costs $800-$1,500 to repair.
Prevention: Drain every drain plug. Use a shop vac to blow out residual water. Verify all lines are empty before closing.
Mistake #2: Wrapping the Heater with a Tarp
Tarps trap moisture, promote corrosion, and create nesting sites for rodents. Pool technicians are adamant: tarps are a bad idea.
Prevention: Use plywood only, over the top vent. Allow air circulation around the heater body.
Mistake #3: Missing the Second Drain Plug
Many heaters have two drain plugs. Pool owners find one and think they’re done. Water trapped in the second location freezes and causes leaks.
Prevention: Consult your heater manual before closing. Identify all drain points. Take photos of their locations.
Mistake #4: Closing Too Early (Water Still Warm)
Closing when water is above 60°F traps warm water under your pool cover. This algae blooms and turns your pool green by spring, requiring expensive chemical treatment.
Prevention: Wait until water temperature is consistently below 60°F. Test with a pool thermometer weekly in fall.
Mistake #5: Forgetting to Turn Off Gas at Both Valves
Gas leaks are a safety hazard. Turning off only the heater valve or only the tank valve leaves gas present in the system.
Prevention: Always close BOTH the heater valve AND the tank/line valve. Take a photo of both valve locations for verification.
Mistake #6: Not Blowing Out Lines Thoroughly
Blowing out lines for 2 minutes is insufficient. Residual water in elbows and low spots freezes and cracks PVC.
Prevention: Blow out each line for a minimum of 5-10 minutes. Listen for the sound change when water transitions to air.
Mistake #7: Leaving the Pump in ON Mode
Accidentally leaving the pump running during a freeze means water continuously cycles through vulnerable pipes and components.
Prevention: Turn off the electrical breaker AND the manual pump switch. Label the breaker with tape: “Pool – DO NOT USE UNTIL SPRING.”
⚠ WARNING: After winterizing, ask your family members NOT to touch pool equipment. Kids sometimes accidentally restart pumps or remove drain plugs out of curiosity. Post a “CLOSED FOR WINTER” sign on your equipment pad as a visual reminder.
Regional Considerations: Climate-Specific Winterization Strategies
Extreme Cold Climates (Upper Midwest, Northern Plains, Northeast)
Challenge: Temperatures drop below freezing for weeks or months. Any residual water will freeze.
Strategy: Maximum drainage, blow-out lines thoroughly, consider RV-type antifreeze in extreme cases, disconnect heater from system entirely.
Moderate Cold Climates (Mid-Atlantic, Upper South, Mountain West)
Challenge: Freeze-thaw cycles. Temperatures fluctuate between 30°F and 50°F, causing expansion/contraction stress.
Strategy: Use bypass valve to prevent water circulation, blow out lines, ensure all drains open freely (may need to verify again mid-winter).
Mild Winter Climates (Texas, Southeast, Southern California)
Challenge: Occasional cold snaps followed by warm periods. Heater damage is less about freeze and more about moisture/corrosion during mild months.
Strategy: Drain and protect against corrosion (use light oil or silicone spray on metal parts), ensure good air circulation, leave plywood over intake only.
Pacific Northwest (Moisture Management)
Challenge: High humidity and frequent rain mean constant moisture exposure. Even without freezing, moisture promotes corrosion.
Strategy: Ensure excellent drainage, blow out all lines multiple times, consider a moisture-absorbing product inside the heater, avoid any covering that traps humidity.
Coastal States (Salt Air Corrosion)
Challenge: Salt air accelerates corrosion of metal components. Winterization must prioritize corrosion prevention.
Strategy: Apply protective coating (light oil or silicone spray) to exposed metal, ensure excellent air circulation around heater, inspect for corrosion before closing.
“Living on the coast means salt air gets everywhere. I spray my heater with light silicone-based protectant before closing it up. Costs $15 and adds years of life.”
– Coastal pool owner, r/pools
Spring Startup: Troubleshooting Common Issues from Poor Winterization
Even with proper winterization, sometimes problems appear in spring. Here’s how to diagnose them:
| Spring Problem | Root Cause (Usually) | Solution | Cost to Fix |
|---|---|---|---|
| Heater gushing water at startup | Water entered heater during winter (freeze damage crack) | Professional repair or heat exchanger replacement | $800-$1,500 |
| Heater won’t ignite (gas) | Water trapped in gas line or igniter wet | Blow out lines with air, check igniter electrode | $100-$300 |
| Heat pump not cycling on | Water in electrical connections, compressor failure | Professional electrical diagnosis, possible compressor replacement | $500-$2,000 |
| Slow water flow from heater | Debris or freeze damage in lines | Flush lines with water, clean strainers | $50-$150 |
| Visible cracks in heat exchanger | Freeze damage from water left in heater | Heat exchanger replacement | $1,200-$2,500 |
| Corrosion on metal components | Moisture trapped under tarp or poor air circulation | Clean with vinegar/wire brush, apply protectant spray | $20-$100 |
Spring Startup Tip: Before fully restarting your system in spring, have a professional pool technician inspect your heater for freeze damage. A$150-$250inspection now could save you$2,000+in repairs by catching problems early.
What Does Proper Winterization Really Cost?
Cost of Winterization (DIY)
- Basic supplies: $0-50 (wrench set, rags, drain pan if you don’t already own)
- Shop vacuum rental: $20-40 (if you don’t own one)
- Bypass valve (if needed): $30-80
- Plywood: $10-20
- Total DIY cost: $50-$200 (one-time, if you don’t own tools)
Cost of Professional Winterization
- Professional winterization service: $300-$800
- Includes: Complete drainage, line blow-out, disconnect service, debris removal, documentation
Cost of NOT Winterizing (Repairs)
- Single cracked heat exchanger: $800-$1,500
- Widespread freeze damage (filter, pump, heater, lines): $5,000-$20,000+
- Complete system replacement: $8,000-$15,000
💡 THE MATH: DIY winterization costs$50-200. Professional winterization costs$300-800. NOT winterizing costs$5,000-20,000on average. Even paying for professional winterization is 20x cheaper than freeze damage repairs. Do the winterization.
Does Homeowners Insurance Cover Pool Heater Freeze Damage?
This is a critical question for pool owners worried about costly repairs.
The Short Answer
Most homeowners insurance policies DO NOT cover pool heater freeze damage if you failed to winterize properly. Insurance considers this “negligence” or “lack of proper maintenance.”
Exceptions
Some policies may cover freeze damage if:
- Damage was caused by an unusually severe, unexpected freeze (freak weather event beyond your control)
- You can document that you performed winterization correctly
- Damage occurred despite proper winterization (manufacturer defect, extreme weather)
Action Item: Check Your Policy
Before this winter, call your insurance agent and ask specifically:
- “Does my homeowners policy cover pool equipment freeze damage?”
- “What documentation do I need to prove winterization if I file a claim?”
- “Are there any exclusions for above-ground pools or pool heaters?”
Having this conversation now prevents unpleasant surprises if damage occurs.
⚠ WARNING: Do not assume your insurance covers freeze damage. Most policies explicitly exclude it if you failed to winterize. Take winterization seriously – it’s your responsibility as the equipment owner.
When Should You Reopen Your Pool Heater in Spring?
Timing: Wait Until All Risk of Hard Freeze Has Passed
Opening your heater too early means exposing it to one more late freeze. Wait until:
- Your region’s last frost date has passed (varies by location, typically April-June)
- Nighttime temperatures consistently stay above 50°F
- Your pool water temperature is rising and you want to accelerate warming
Spring Startup Steps (Brief Overview)
Full spring startup guide details are covered in our companion article, but here’s the quick version:
- Verify all drain plugs are installed correctly and tightened
- Reconnect heater to pump/filter system (using photos from winterization as reference)
- Open gas valves (if gas heater) at both the heater and the tank
- Turn bypass valve to HEATER position (water flows through heater again)
- Set electrical breaker to ON
- Prime the system by running the pump for 5 minutes before starting the heater
- Monitor first startup closely for leaks, unusual sounds, or error codes
Spring Inspection Recommendation: Have a professional pool technician inspect your heater before first startup. A$150-$250inspection catches problems before expensive damage occurs. Many pool owners schedule spring inspections as part of their regular maintenance routine.
Above-Ground Pool Heater Fall Closing FAQ
Q: When should I close my above ground pool heater for winter?
Close your heater when your pool water temperature drops below 60°F and is dropping consistently. For most USA regions, this occurs in mid-to-late September (northern climates) through November-December (warm climates). Don’t judge by the calendar; judge by water temperature measured with a pool thermometer. Close before the first hard freeze in your area (when nighttime temps stay below 32°F for 6+ hours).
Q: Can I wait until after the first frost to close my heater?
Not recommended. The moment temperatures drop below freezing, water inside your heater, pipes, and filter begins freezing. Even a single night of 25°F weather can crack heat exchanger tubes if water is present. Close your heater before the first hard freeze, not after. If you’ve already experienced a freeze, inspect your heater immediately for cracks or leaks.
Q: How late is too late to winterize my pool heater?
Winterize as soon as possible once water temperature drops below 60°F and your region’s first hard freeze is forecasted. The later you wait, the higher the risk of unexpected cold snaps catching you unprepared.
In unpredictable climates (Texas, Pacific Northwest), check weather forecasts weekly in September-November and winterize when cold fronts appear.
If it’s already freezing and you haven’t winterized, do it immediately, but be prepared for possible freeze damage already in progress.
Q: Do I really need to drain ALL the water from my pool heater?
Yes, absolutely. Water left inside heat exchangers, headers, and pipes will freeze, expand 9%, and crack expensive components. Freeze damage can cost $800-$2,500 to repair.
Drain every drop by:
(1) opening all drain plugs
(2) using a shop vacuum to blow out residual water in pipes
(3) tipping the heater slightly if possible to encourage complete drainage.
Don’t skip this step.
Q: How do I find the drain plug on my above ground pool heater?
Drain plugs are usually located at the lowest points on the heater where water naturally settles.
Most heaters have: (1) a bottom drain plug directly under the unit where the pump connects, and (2) a side/header drain plug on the opposite side of the heater body.
Consult your heater’s manual for exact locations, they vary by manufacturer. Take photos of drain locations before removing plugs so you can find them again next spring. Place all plugs in a labeled bag for safekeeping.
Q: Should I cover my pool heater during winter?
Do NOT wrap your heater with a tarp. Tarps trap moisture, promote corrosion, and create nesting sites for rodents. Instead, place a sheet of plywood over the top fan intake/vent only.
This prevents leaves and snow from entering the heater while allowing air circulation. Plywood can be easily removed in spring. This approach protects your equipment without the moisture trap hazard of a full cover.
Q: Should I turn off the gas to my pool heater for winter?
Yes, absolutely, and at TWO separate valves.
(1) Close the valve on the heater itself (usually a knob or handle on the control side)
(2) close the valve at your propane tank or natural gas line. Turning off only one valve is a safety hazard; gas can leak from the heater into the atmosphere or create fire/explosion risk when you restart.
Taking a photo of both valve locations before winter helps ensure you remember to reopen both valves in spring.
Q: Is it safe to shut off the breaker to my pool heater?
Yes, completely safe and recommended. Shut off the electrical breaker to your heater on your home’s electrical panel. Label the breaker clearly with tape so no one accidentally restarts the system during winter.
This prevents accidental pump activation and protects your heater from power surges during winter storms. Switch the breaker back on when you’re ready to reopen the heater in spring.
Q: Can I store my heat pump indoors for winter?
No, heat pumps must stay outdoors. They’re designed to withstand winter weather and function in cold temperatures. Storing indoors traps moisture inside the unit and damages internal electrical components.
Instead, winterize it in place outdoors: drain completely, turn off breaker, protect the top intake with plywood only (no full cover), and ensure good air circulation around the cabinet.
Q: Do solar pool heaters need to be winterized?
Yes, solar heaters need winterization in cold climates (anywhere that experiences freezing). The collector panels contain water that will freeze and crack tubing.
Winterization steps:
(1) drain collector panels completely
(2) close the diverter valve to CLOSED position
(3) blow out all lines with shop vac or air compressor
(4) turn off electrical breaker to the pump
(5) clean panels before closing. In warm climates (Florida, Southern California) where freezing never occurs, minimal winterization is needed.
Q: How is winterizing an electric pool heater different?
Electric heaters are simpler to winterize than gas heaters.
Steps:
(1) turn off electrical breaker
(2) locate and open the drain plug on the bottom of the unit
(3) use shop vac to blow out connected pipes for 5+ minutes
(4) if possible, disconnect the heater from the system using union fittings
(5) cover the electrical terminal box with a plastic bag to prevent moisture entry
(6) store the drain plug safely. Electric heaters have fewer components than gas or heat pumps, making them slightly easier to winterize.
Q: How much does it cost to repair a pool heater with freeze damage?
Freeze damage repair costs depend on severity:
(1) Cracked heat exchanger tube: $800-$1,500
(2) Widespread freeze damage across multiple components: $5,000-$10,000
(3) Complete system replacement: $8,000-$15,000+. Reddit horror story: one pool owner faced a $20,000 repair bill after a severe freeze damaged filter, pump, and heater simultaneously. Proper winterization (cost: $50-$800) prevents all of this damage.
Q: Does homeowners insurance cover pool heater freeze damage?
Most homeowners insurance policies do NOT cover pool heater freeze damage if you failed to winterize properly. Insurance considers this ‘negligence’ or ‘lack of maintenance.’
Exceptions may apply if damage was caused by an unusually severe, unexpected freeze that occurred despite proper winterization, or if you can document that you winterized correctly. Contact your insurance agent before winter to clarify coverage and documentation requirements.
Q: When should I reopen my pool heater in spring?
Reopen your heater after your region’s last frost date has passed (varies by location, typically April-June) and nighttime temperatures consistently stay above 50°F. Reopen too early and you risk exposing your heater to one more late freeze.
Wait until:
(1) no hard freezes are forecasted for the next 2+ weeks
(2) your pool water temperature is rising
(3) you’re ready to use the heater for heating. Refer to our spring startup guide for detailed reopening instructions.
Q: Why is my heater leaking when I start it up in spring?
Spring leaks usually indicate freeze damage that occurred during winter. Possible causes:
(1) Water left in the heater during winterization froze and cracked the heat exchanger tubes
(2) Residual water in pipes froze and fractured PVC or copper lines
(3) Drain plugs weren’t sealed tightly, allowing water to seep in. If leaking occurs at startup, stop running the heater immediately and have a professional technician inspect for cracks. Continuing to run a damaged heater can worsen the problem and increase repair costs.
Keep Your Pool Heater Safe All Winter
Winterizing your above-ground pool heater is one of the most important maintenance tasks you’ll do all year. It takes just 1-2 hours and costs $50-$800, yet it prevents $5,000-$20,000 in potential freeze damage.
The difference between a pool owner who winterizes properly and one who doesn’t comes down to that first spring startup. One opens their heater to a system that works perfectly. The other opens theirs to cracked heat exchangers, broken pipes, and expensive repair bills.
“Winterization is like changing your car’s oil. It’s boring, takes an hour, and costs almost nothing. But skipping it for a few years? That’s when you have a $5,000 problem.” James Taylor, Pool Heater Technician
This guide covers every heater type, every climate zone, and every mistake to avoid. You now have the knowledge to winterize your heater properly and protect your investment.
Bookmark this guide, save it to your phone, or print the checklist below. Come October or November when temperatures start dropping, you’ll have everything you need to close your heater the right way.
Related: Above-Ground Pool Summer Heat Management
Ready to Winterize?
Download our printable fall closing checklist (below) and follow our step-by-step guide for your specific heater type. Then come spring, you’ll have peace of mind knowing your heater survived winter in perfect condition.
Download the Free Printable Above-Ground Pool Heater Fall Closing Checklist (PDF)
Protect your pool heater from costly freeze damage with this step-by-step winterization checklist for gas, heat pump, solar, and electric heaters.
Pre-Winterization (48 Hours Before)
- Turn off heater and allow to cool for 48 hours
- Confirm pool water temperature is below 60°F
- Verify no hard freezes are forecasted for 7+ days
- Gather all tools: wrench set, screwdrivers, shop vac, drain pan, towels
- Locate heater manual or look up model number online for specific instructions
For Gas Heaters
- Close gas valve at heater (turn knob/handle clockwise)
- Close gas valve at propane tank or natural gas line (double-check both are closed)
- Turn off electrical breaker to heater
- Open bottom drain plug and catch water in drain pan
- Open side/header drain plug (check manual for location)
- Allow water to drain completely (10-15 minutes)
- Blow out lines with shop vac or air compressor for 5+ minutes
- Set bypass valve to BYPASS position (if equipped)
- Optionally disconnect heater from pump/filter using union fittings
For Heat Pumps
- Set control panel to OFF or WINTER mode (not Standby)
- Turn off electrical breaker to heat pump
- Locate and open drain plugs (check manual – heat pumps often have 2+)
- Allow water to drain completely
- Blow out lines with shop vac or air compressor for 7-10 minutes
- Disconnect heater from system (recommended) using union fittings
- Do NOT store indoors – heat pump must stay outside
For Solar Heaters
- Drain collector panels completely (open drain valves at bottom)
- Set diverter valve to CLOSED position
- Blow out collector lines with shop vac or air compressor for 5+ minutes
- Turn off electrical breaker to circulation pump
- Clean solar panels with soft brush to remove debris
For Electric Heaters
- Turn off electrical breaker to heater
- Open bottom drain plug and catch water in drain pan
- Allow water to drain completely
- Blow out connected pipes with shop vac for 5+ minutes
- Optionally disconnect from system using union fittings
- Cover electrical terminal box with plastic bag
Final Steps (All Heater Types)
- Place all drain plugs in labeled plastic bag (label: “Spring 2027”)
- Do NOT wrap heater with tarp (moisture trap hazard)
- Place plywood sheet over top vent/intake only
- Verify electrical breaker is OFF and label it “POOL – DO NOT USE”
- Take photos of drain plug locations and bypass valve position
- Take photos of gas valve positions (heater + tank)
- Store heater manual and photos with winterization materials
- Schedule spring startup inspection (professional technician recommended)
This guide was reviewed by James “Jim” Taylor, a pool heater technician with 15+ years of experience in the Gulf Coast region, and Robert “Rob” Thompson, a certified gas technician specializing in pool heater installation and safety. Our team has winterized pool heaters from Minnesota to Florida, giving us firsthand experience with every climate challenge.
abovegroundpoolheater.com
Last Updated: May 2026 | Fact-Checked by: Certified Pool Technicians | Manufacturer Verification: Steps verified against Raypak, Hayward, Pentair, and FibroPool procedures.
Important Note: Always consult your heater’s manufacturer manual for model-specific instructions. Every heater is different, and manufacturer guidelines take precedence over general advice. When in doubt, contact the manufacturer directly or hire a professional pool technician.